Are you new to VALORANT? Not sure what to focus on to improve? No problem! In this beginner’s guide, we’re going to look at four of the most significant areas that new players should look to improve in.
1. Settings
Your in-game settings play a massive role in your performance when it comes to VALORANT. The settings can feel rather overwhelming as you’re first starting out, and there are so many you can change! While we encourage you to search through all the settings and fine-tune them for your computer and your preferences, we’ll take a look at graphics and performance first.
Graphics and Performance
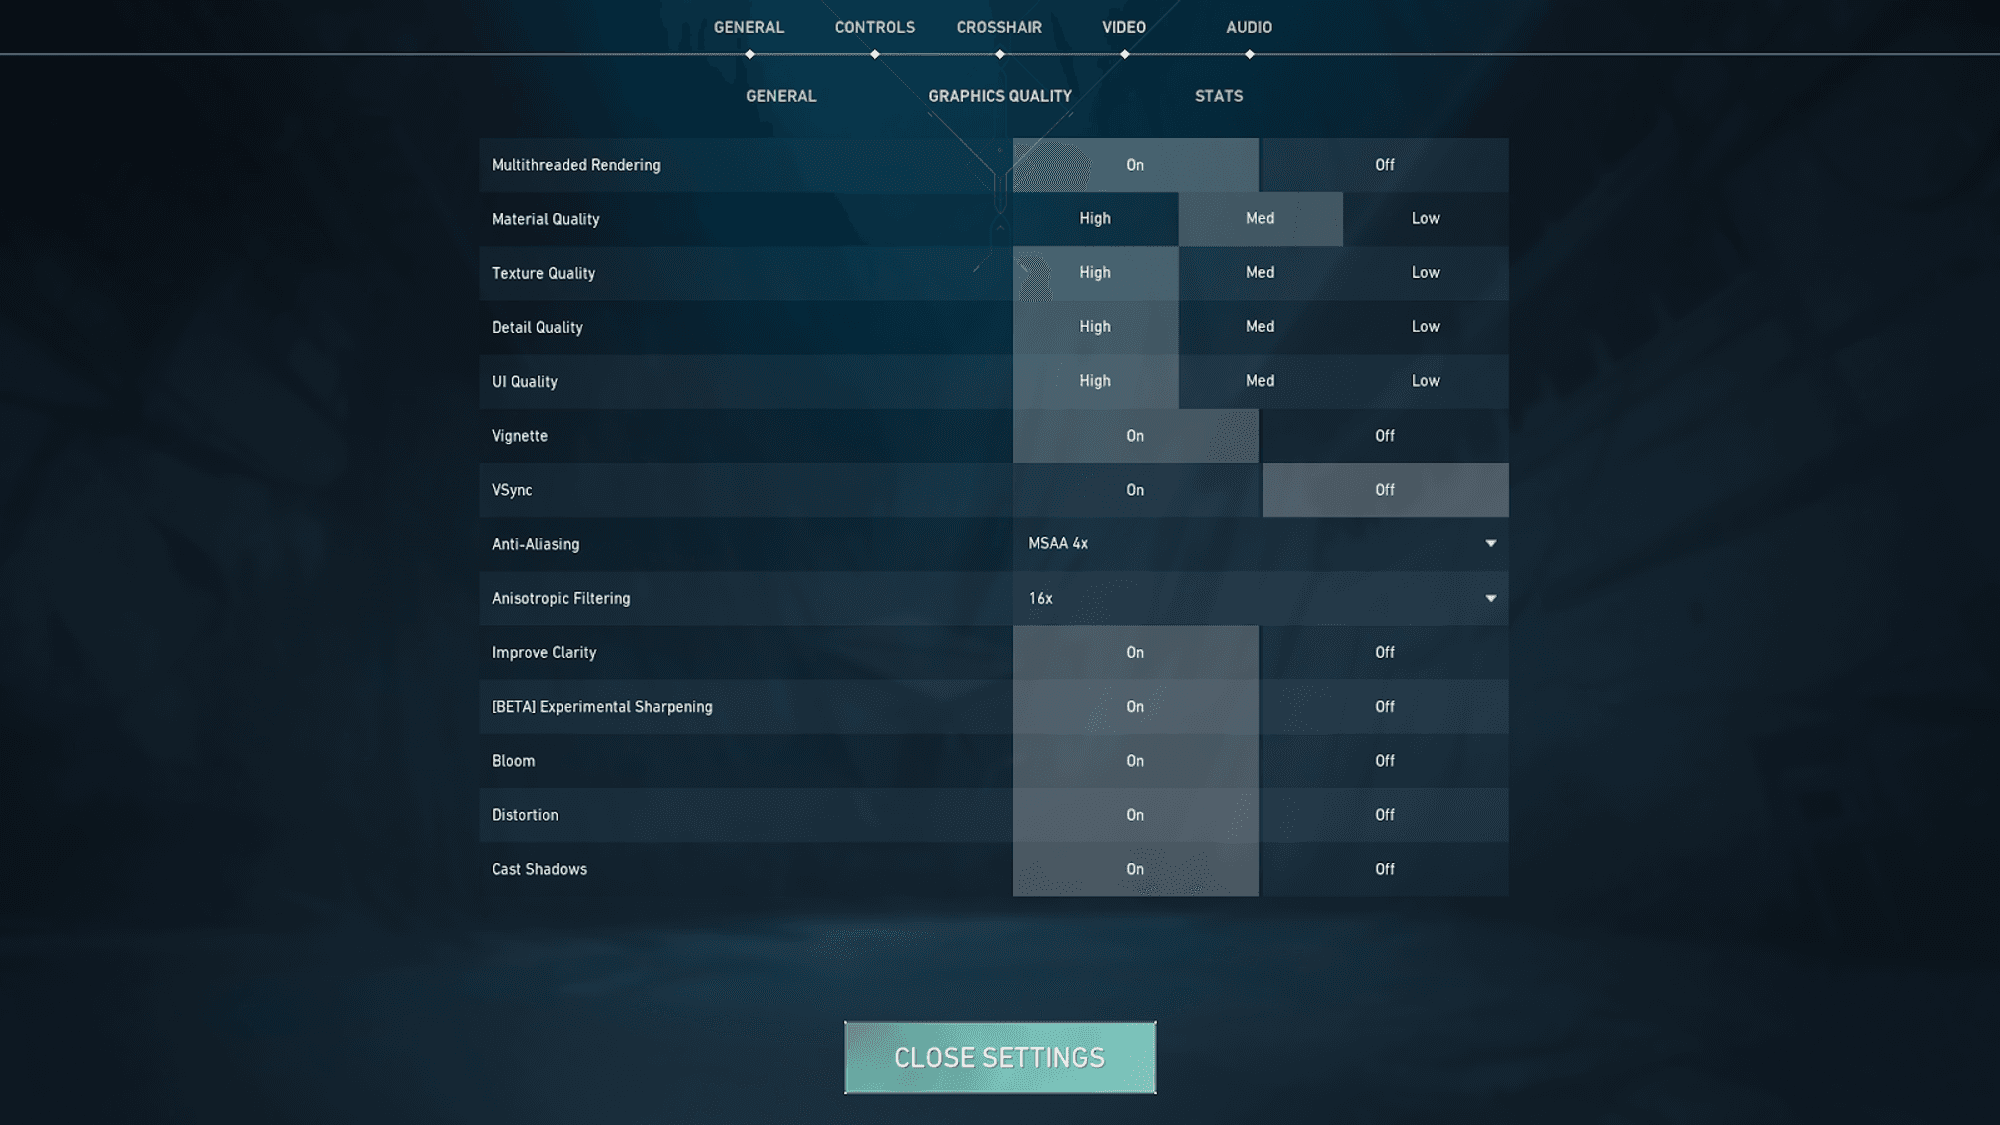
Performance in VALORANT is key. You want to comfortably have more frames than your monitor’s refresh rate can handle to avoid encountering game stutters and freezes that cost you big time. Now, what settings you’ll want to adjust and change is going to depend completely on your computer specs and other variables related to your machine itself. For some general areas to think about changing look at the following game options:
- Material Quality
- Texture Quality
- Detail Quality
- VSync (disable this setting!)
Crosshairs
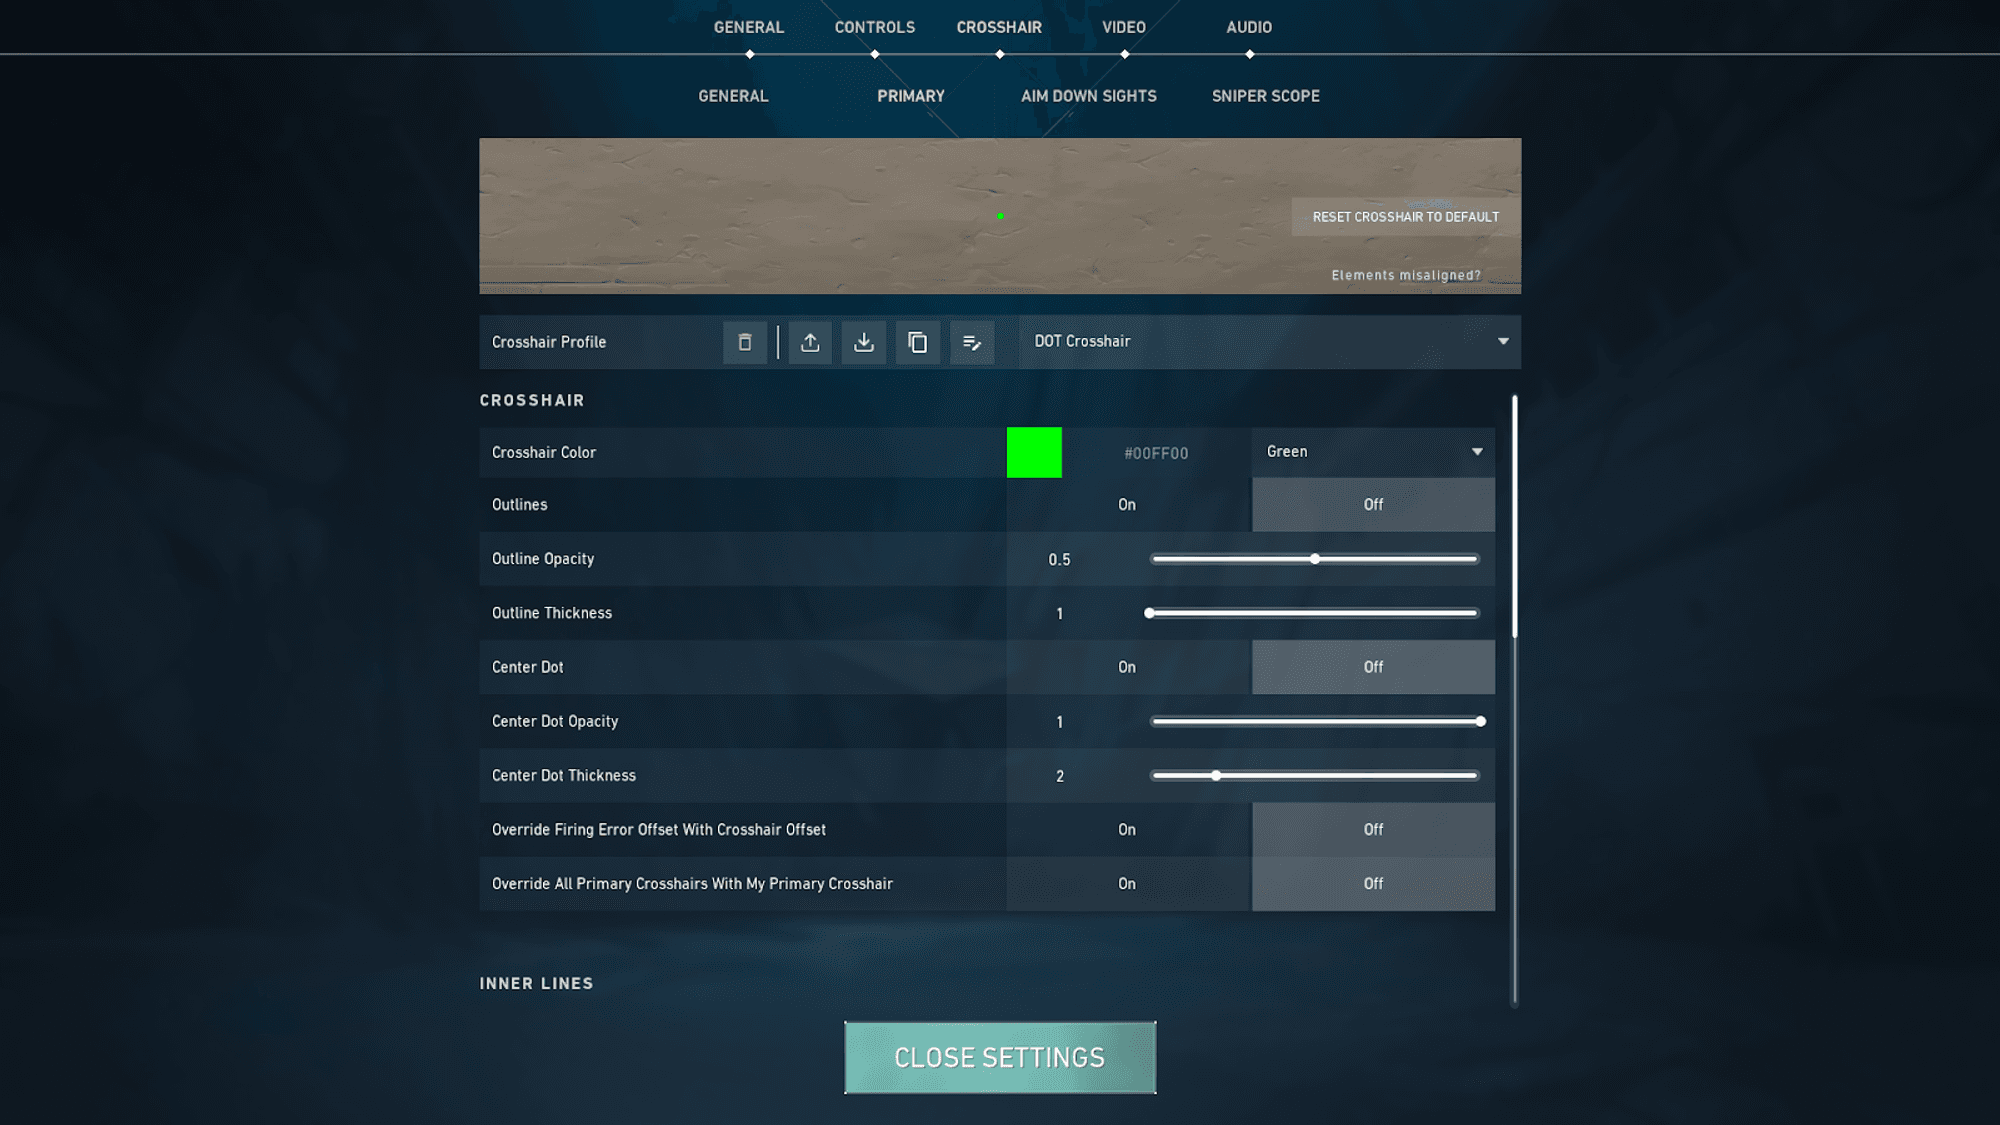
For the next setting, we’ll move on to crosshairs. We feel a need to talk about this setting because the default crosshair that VALORANT sets you up with has some unfavorable features including firing error and movement error. All those settings do is move around on your crosshair any time you’re shooting or moving to let you know your shots will be inaccurate, which could be helpful at the start of your journey, but oftentimes gets distracting and causes you more harm than good. If you find those settings annoying and want some recommendations on crosshairs, here are two that you can use.
Crosshair 1: Dot Crosshair
Crosshair Import Code: 0;s;1;P;c;1;h;0;0t;4;0l;3;0o;0;0a;1;0f;0;1b;0
Crosshair 2: Standard Plus Crosshair
Crosshair Import Code: 0;P;c;1;h;0;f;0;0l;7;0v;0;0a;1;0f;0;1b;0
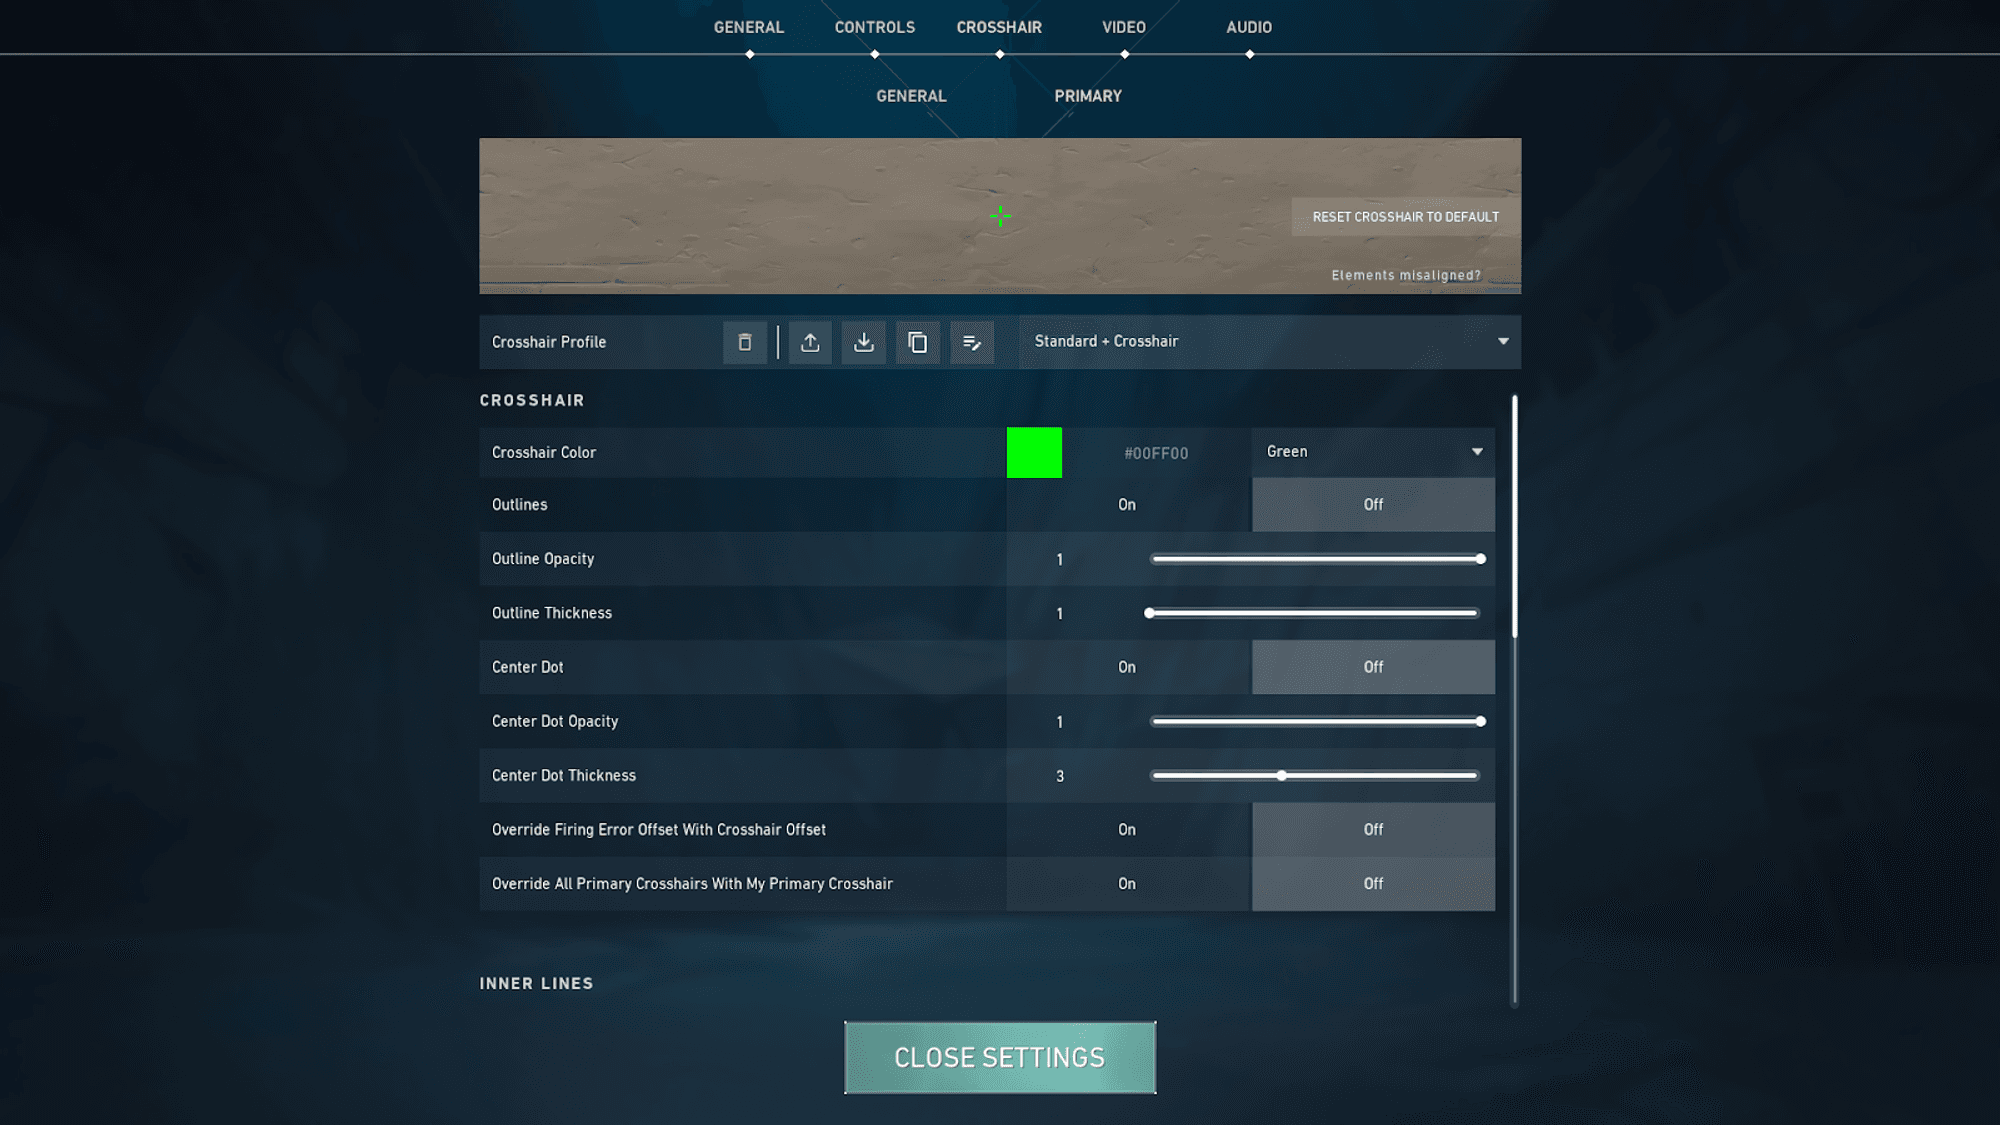
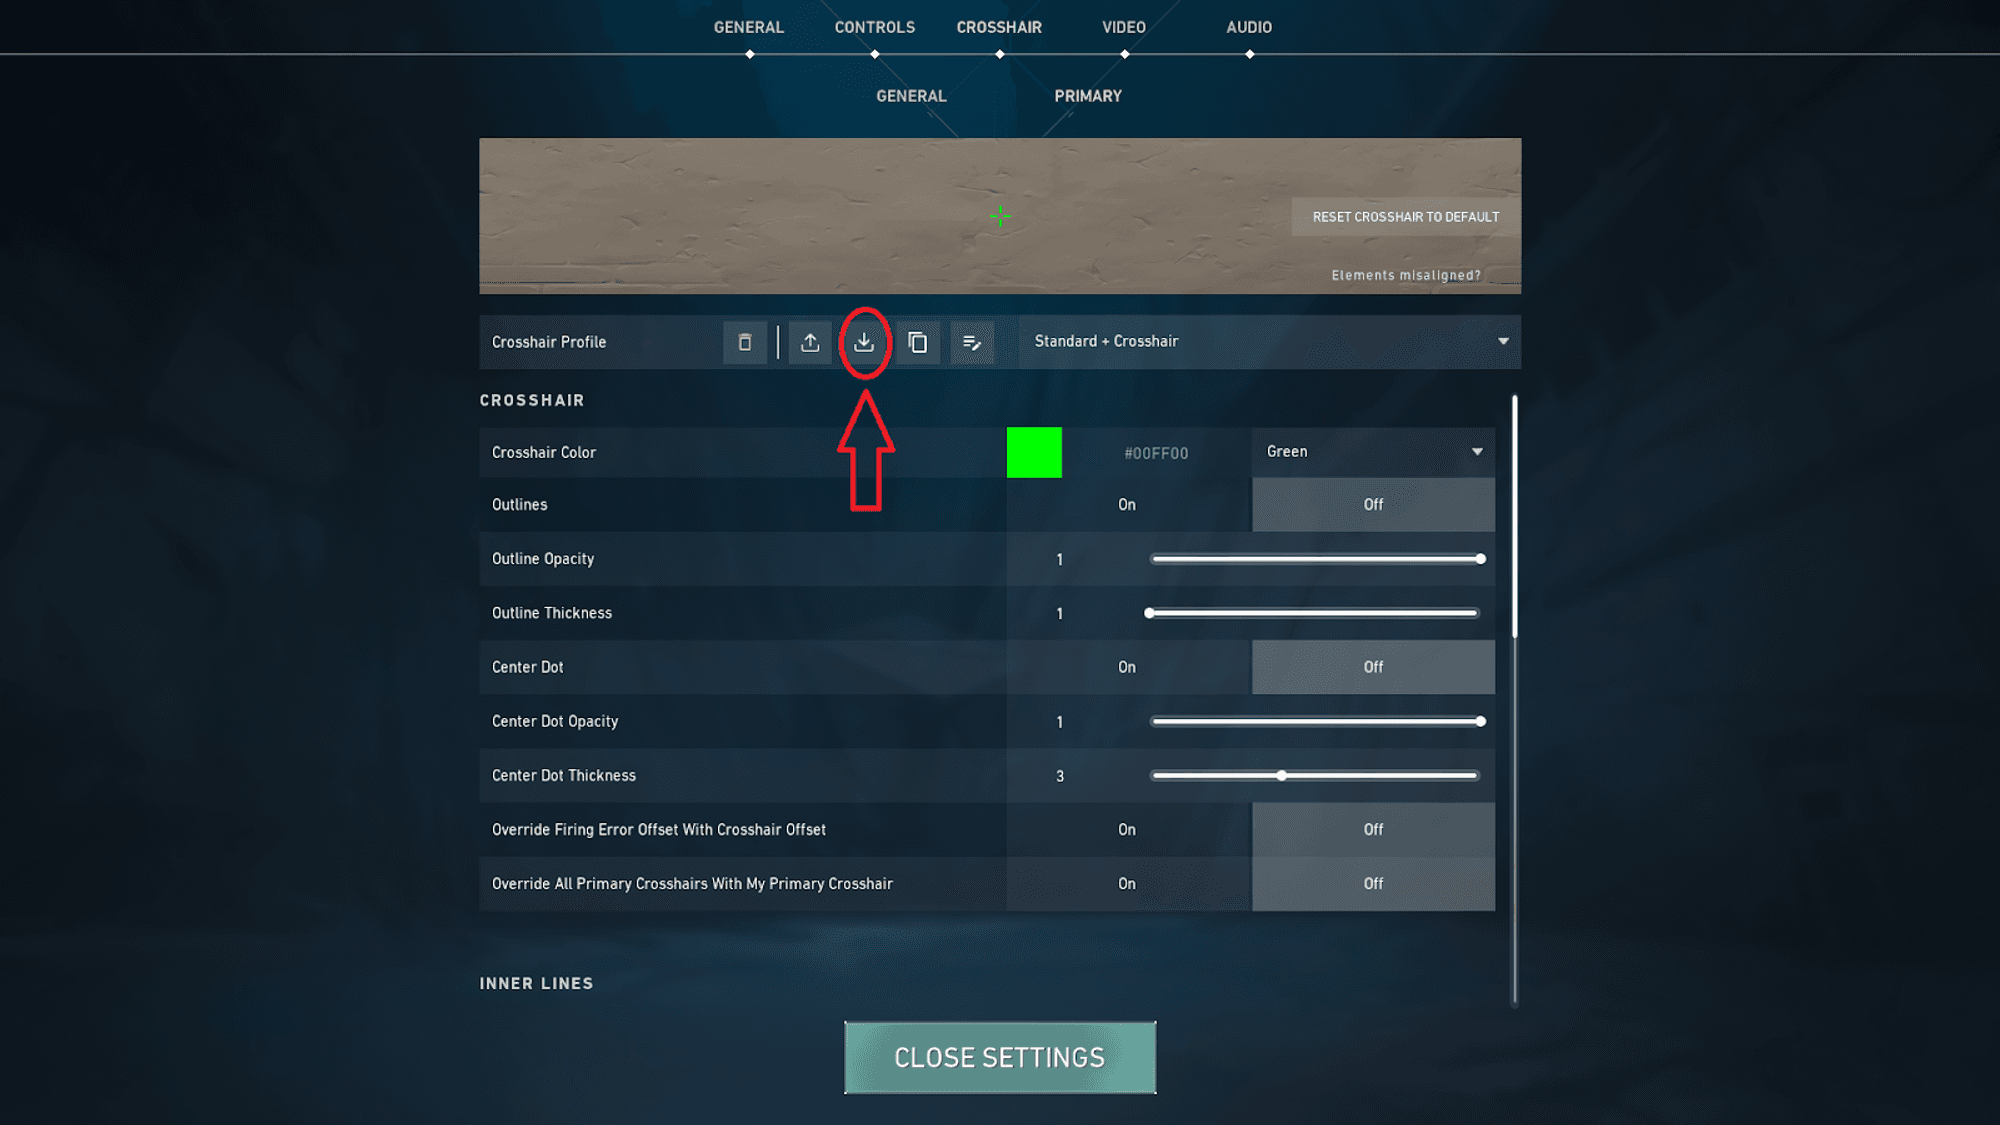
To import one or both of the crosshairs shown here, navigate to the “Import Crosshair” option shown below, and paste the “Crosshair Import Code” shown above:
Sensitivity
While there are more settings that deserve covering, for our final setting in this article, we have to cover sensitivities because of how impactful they are on your gameplay. One mistake many players make is trying to find a pros sensitivity, copy it, and expect to see instant results. While this sounds nice in theory, and you have validation of the sensitivity working, you’re not actually copying it in reality.
When it comes to your sensitivity, there are external factors at play, including:
- Wrist aiming VS Arm aiming
- DPI (Dots per inch)
- Mouse Model
- Mousepad Model
- Wired VS Wireless Mice
This is why we recommend you find your own sensitivity and fine-tune it to your style and your setup. There are a few ways you can do this.
Option 1: Aim Lab Sensitivity Finder
The Sensitivity Finder is a guided experience that has you playing Aim Lab tasks with many different sensitivities. After each task you play, your results are recorded and used to inch you closer and closer to your optimal sensitivity. The tool will have you playing with very high sensitivities, very low sensitivities, and some balanced sensitivities to see which you’re most inclined to perform well with. After you play tasks for roughly 10 minutes, the tool will give you a sensitivity that is automatically converted to VALORANT’s in-game sensitivity that you can then import into your game.
Option 2: Plug and Play
If you’d prefer to find your sensitivity naturally, it’ll be a sort of trial-and-error plug-and-play process. You should try to find a sensitivity initially that feels balanced. Not too high where you can’t control it, but not too low where you can’t turn quickly enough to dodge flashes or flick on an opponent. If you’re inexperienced in FPS titles in general, this process can be tough and takes a bit of time. The major benefit of Option 1 is that it takes a lot of the guesswork out of it, and saves you the trial-and-error process of going through those sensitivities on your own.
Whichever option you choose to use, or however you decide to navigate your journey to finding that perfect sensitivity, it’s something that takes time and small adjustments when you encounter difficult situations that open your eyes to a realization about your sensitivity.
One final tip about sensitivity is that you should avoid changing it every single game. You want to try to build up a muscle memory on your sensitivity once you’ve found something that you’re relatively comfortable with.
2. Agents
Another important part of VALORANT that new players should focus on learning is the agents! Each agent in VALORANT is unique and offers a variety of utilities to support their teammates, entry frag, concuss enemies, and more. Understanding what each of them offers is very important because it will prepare you to face the agents on the enemy team, and work better with certain agents on your own team.
When it comes to learning the agents, there are a few things you can do to expedite your learning. First, you should try out all of the agents you have in a custom match. This might not sound like the most fun gameplay, and truth be told it’s not, but this is one of the best ways to learn what each agent does. Spending about 5 minutes in a custom match on each agent will allow you to see how they function and give you a firm understanding of their kit.
If you’d rather learn the agents while you play, you can do that too! When you are killed in a round, rather than scrolling Twitter or twiddling your thumbs, you should see if there are any agents on your own team that you don’t know well. If the answer is yes, spectate that player and see what their utility is doing.
Finally, you can watch YouTube guides about the agents, which speaking of we will be creating on the Aim Lab YouTube channel.
3. Maps

One of the most important pieces of knowledge you can possess as a VALORANT player is extensive knowledge of the maps. If you become fluent in your understanding of the common rat spots, choke points, and overall layout of the map you’ll be able to navigate the map more efficiently and predict enemy movements based on your knowledge.
Keep in mind that if you’re a new player to VALORANT in this episode, there are quite a few maps you need to learn. This means it can feel a bit difficult to learn the maps and all the common angles you need to know. So here are a few tips for you to learn the maps quickly:
- Navigate the maps in custom matches
- As a bonus, when you’re doing this technique pay attention to the minimap for location names. Those will come in handy when communicating with teammates.
- Play swift play. This will allow you to get into matches faster and experience more maps.
- Switch sites between games. If you play C Site on Haven every game, defend a different site in the next Haven game you get.
Unfortunately with maps, they just take time to learn. Getting in more and more reps will increase your comfort level with the maps, and start to engrain enemy patterns into your memory. Using the tips above you can expedite the learning process, but don’t get too concerned if you feel like it’s taking a while, the maps are very dynamic and complex!
4. Crosshair Placement
For our final and possibly most important fundamental for beginners to learn we have crosshair placement! Crosshair placement is one of the most overpowered things in VALORANT, and it will help you more than anything else. Getting good at this skill will make every single gunfight much easier, and will start to unlock the game for you. Before we jump into the specifics of crosshair placement, It needs to be said that this skill is much easier to master once you’ve learned the maps. Because unfortunately, it’s kind of hard to know where to aim if you don’t know the maps.
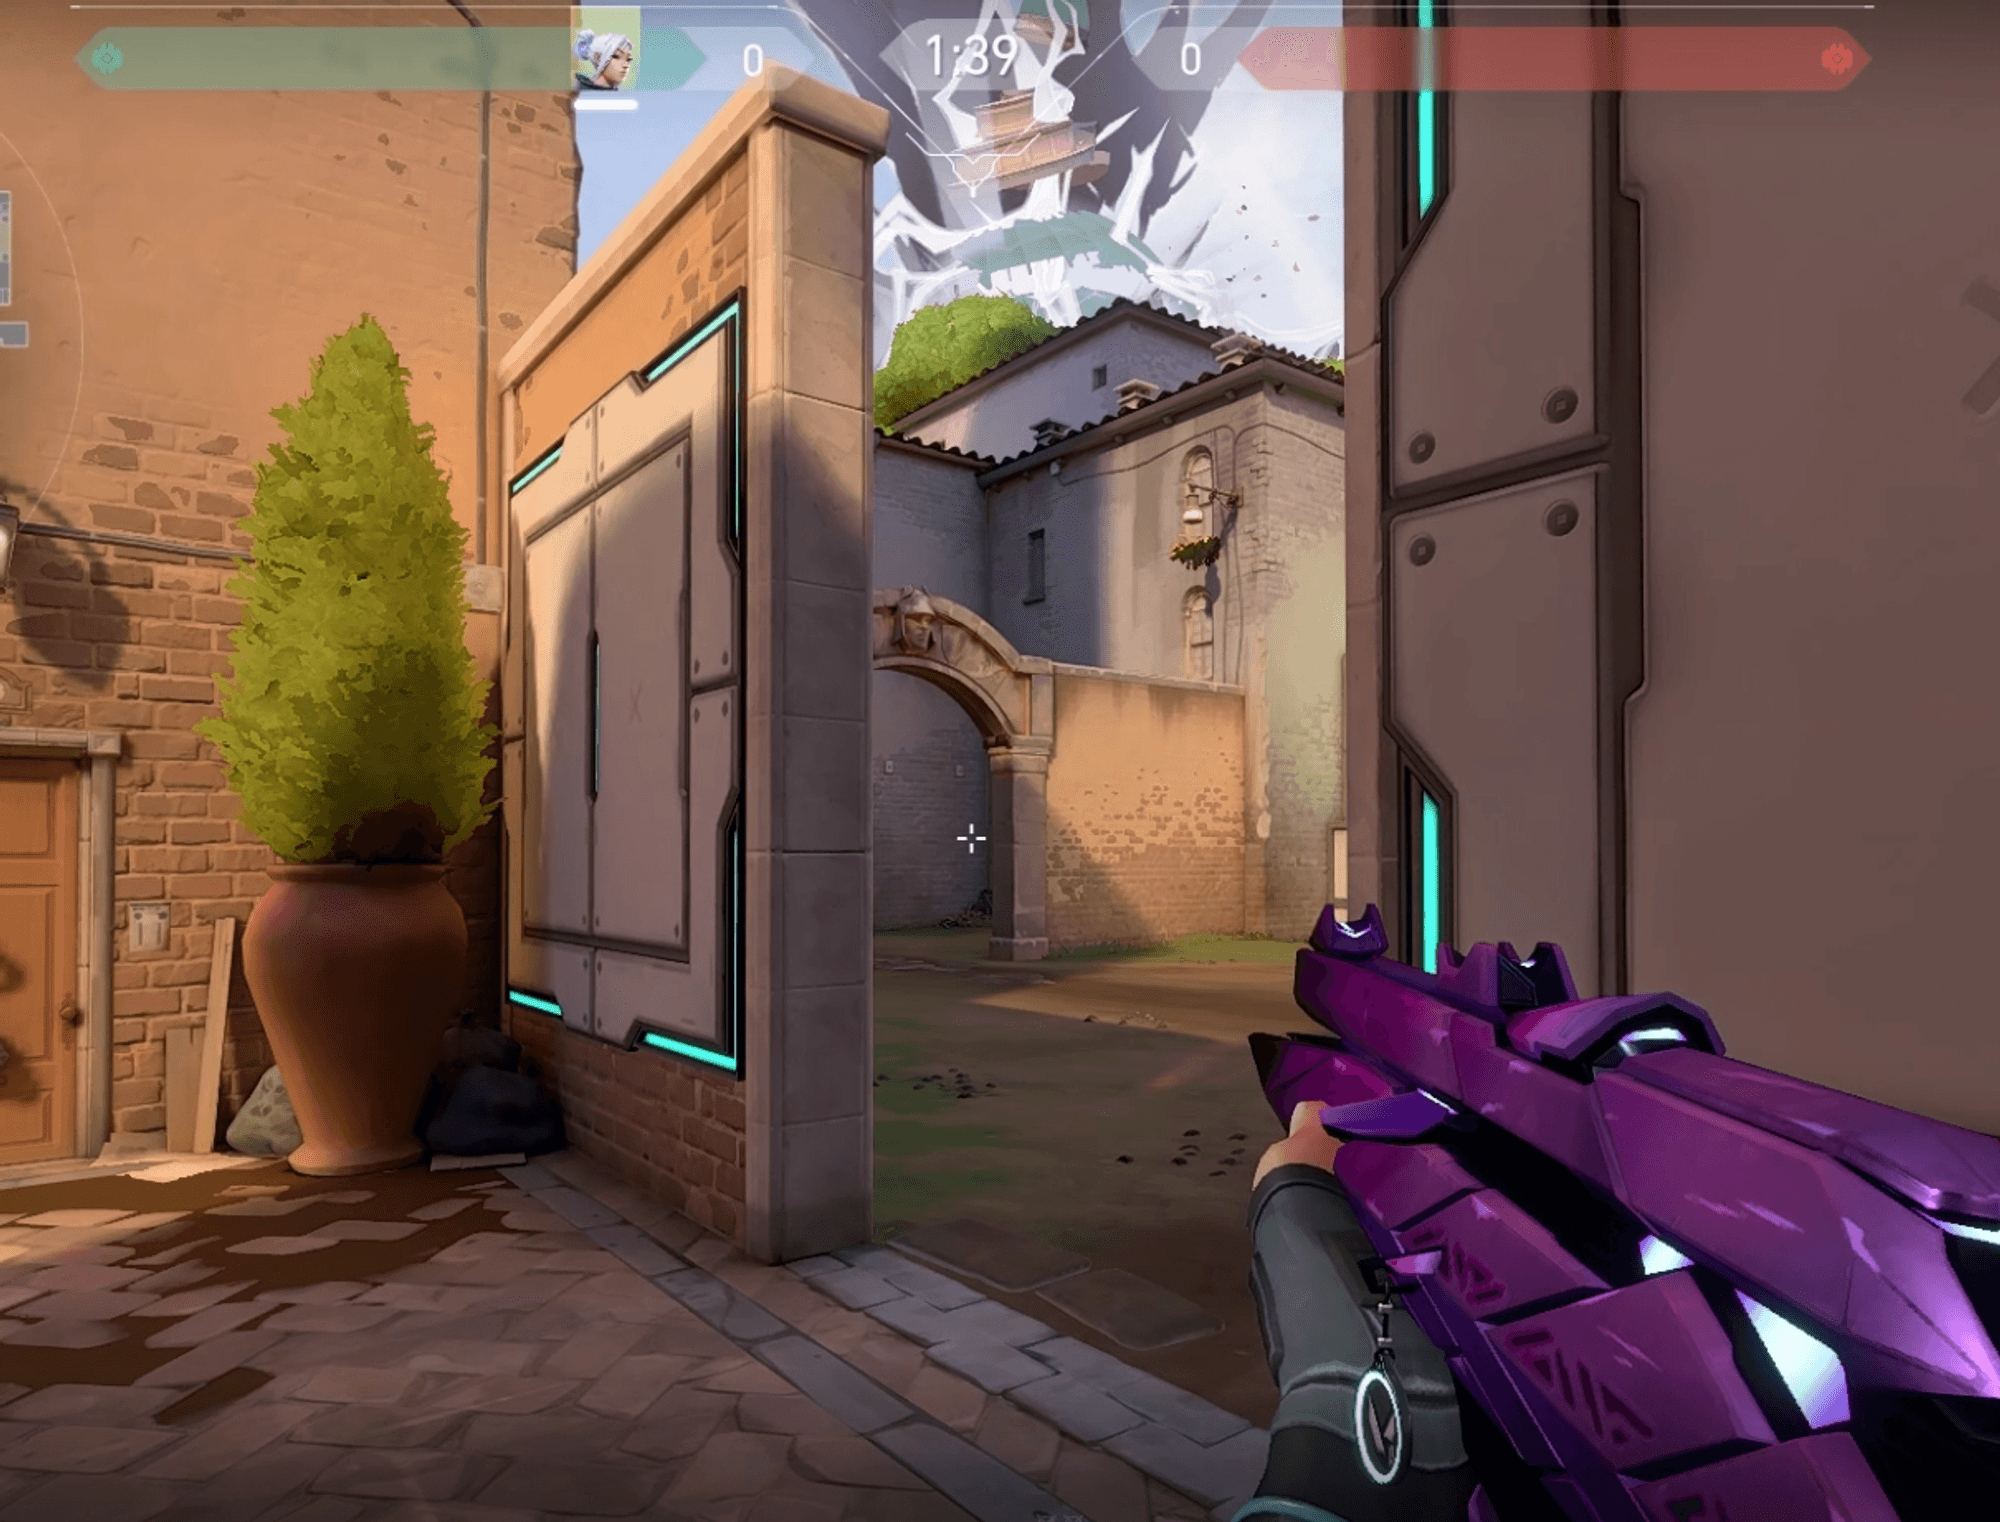
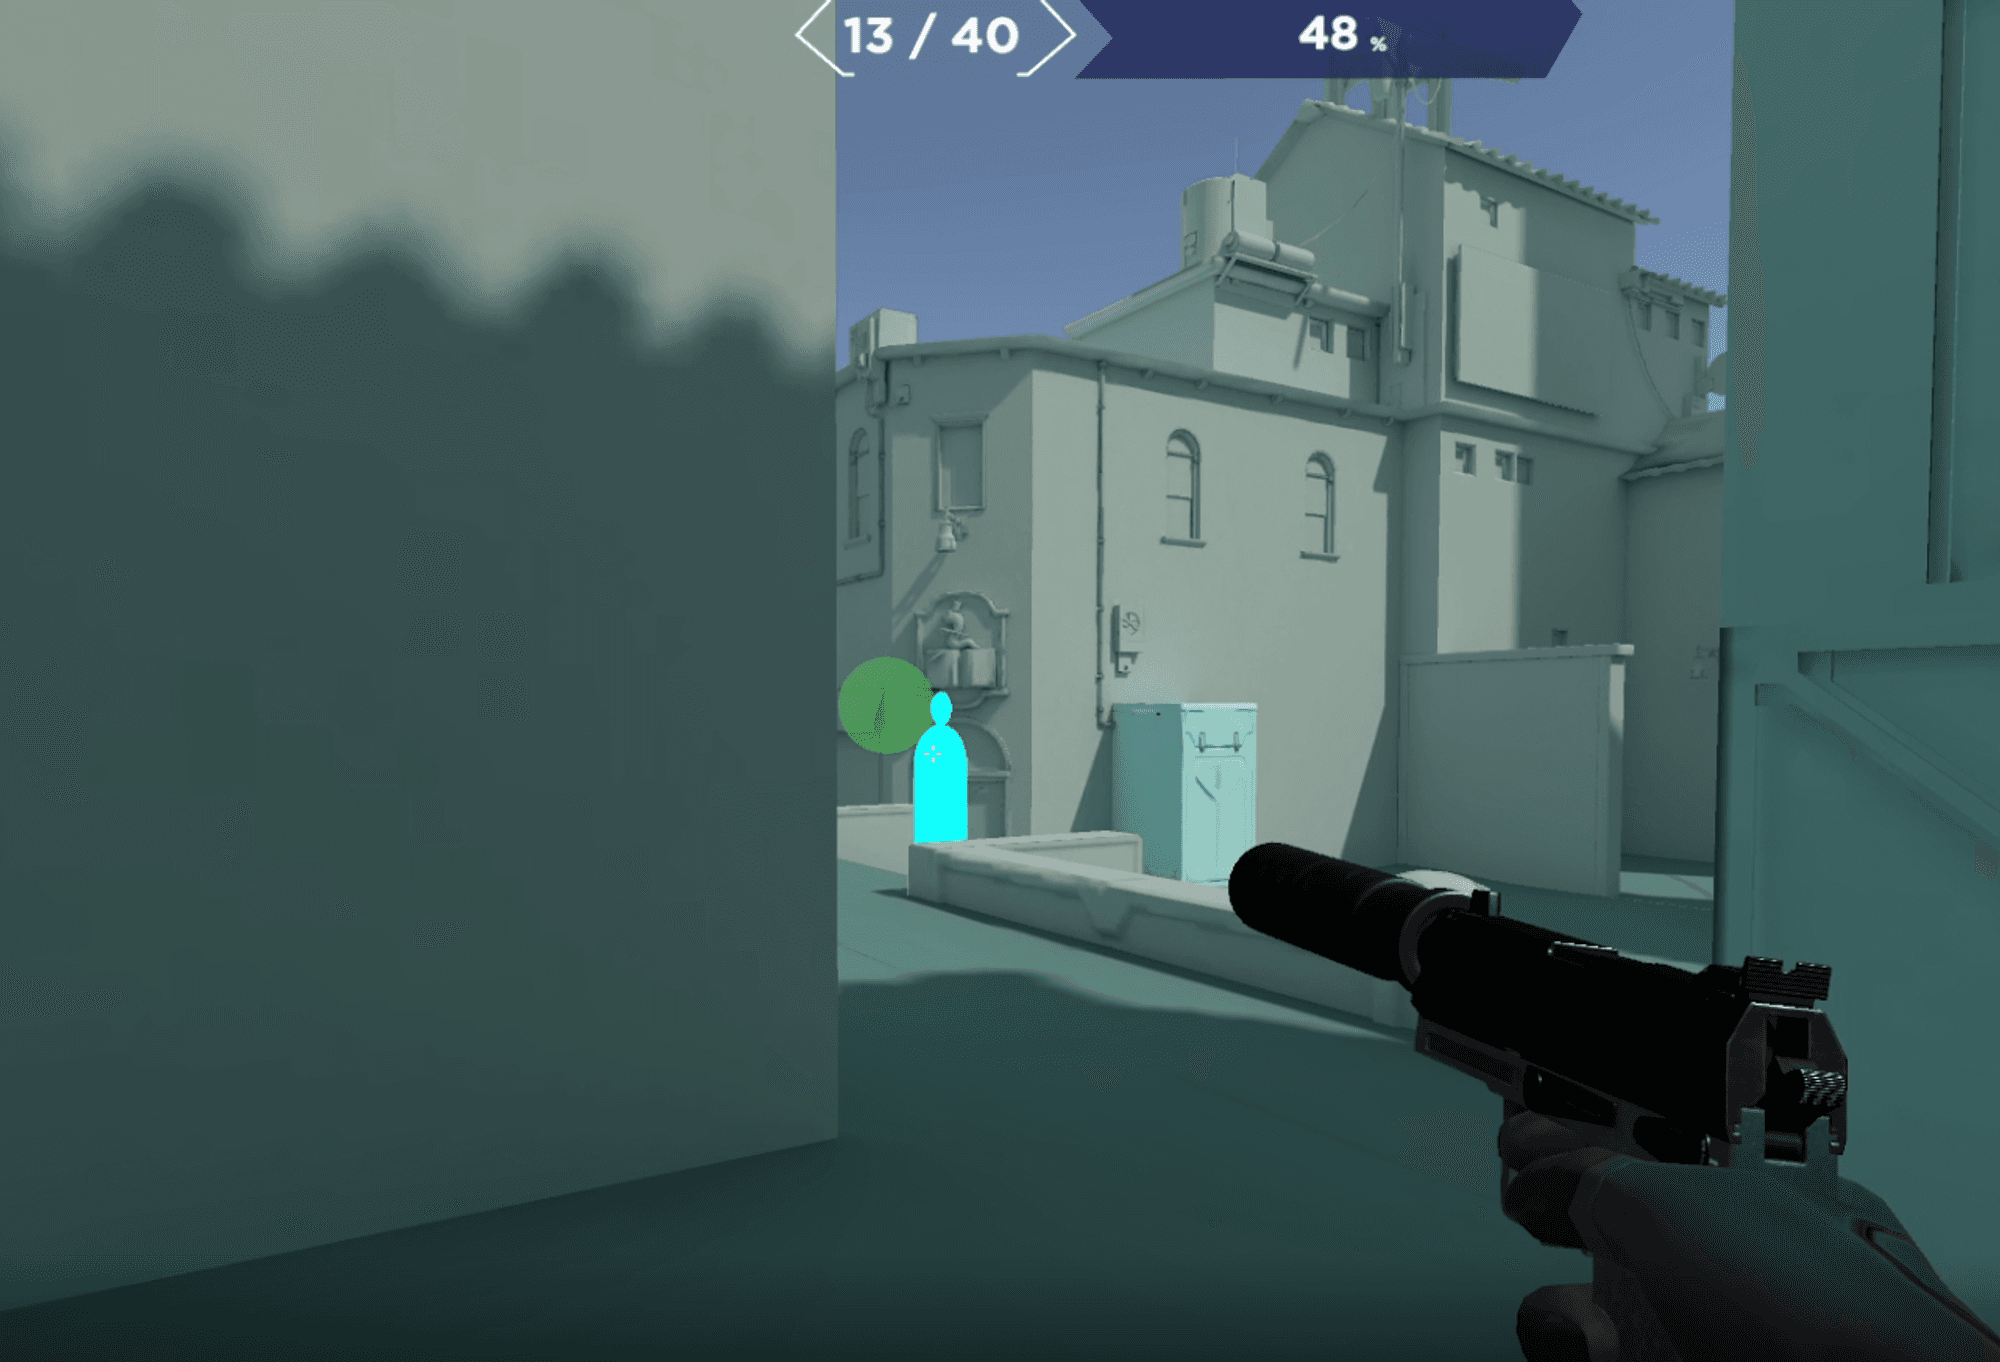
Simply put, crosshair placement is just how it sounds, where you’re placing your crosshair. In VALORANT, the general rule of thumb is that you should place your crosshair where you believe enemies will be playing, at HEAD LEVEL. And I can’t stress the head level part, enough. If you get good at understanding where the head of your opponent will appear on each angle, you will find yourself getting a ton more kills. You want to get in the habit of placing your crosshair at head level on every single angle that you clear. This will help you to avoid leg shotting, as leg shots do less damage and require more bullets to kill an opponent as a result.
Here’s an example of where you would place your crosshair on the mid arches on Ascent.
If you feel like crosshair placement is a pain point for you Aim Lab has a brand new tool called deathmatch ****that teaches you how to get comfortable placing your crosshair at head level. It also helps with learning the maps as we mentioned above. If you’re new to VALORANT and want to have a more guided improvement experience, check out deathmatch on Aim Labs.
After reading through this article and digesting the tips provided, you’ll have a much better time learning VALORANT. Focusing on these 4 concepts will give you a lens to use for improvement. If you struggle with learning any of these fundamentals or need help in VALORANT in general, consider booking a coach!